Our Enhanced Microchipping Method
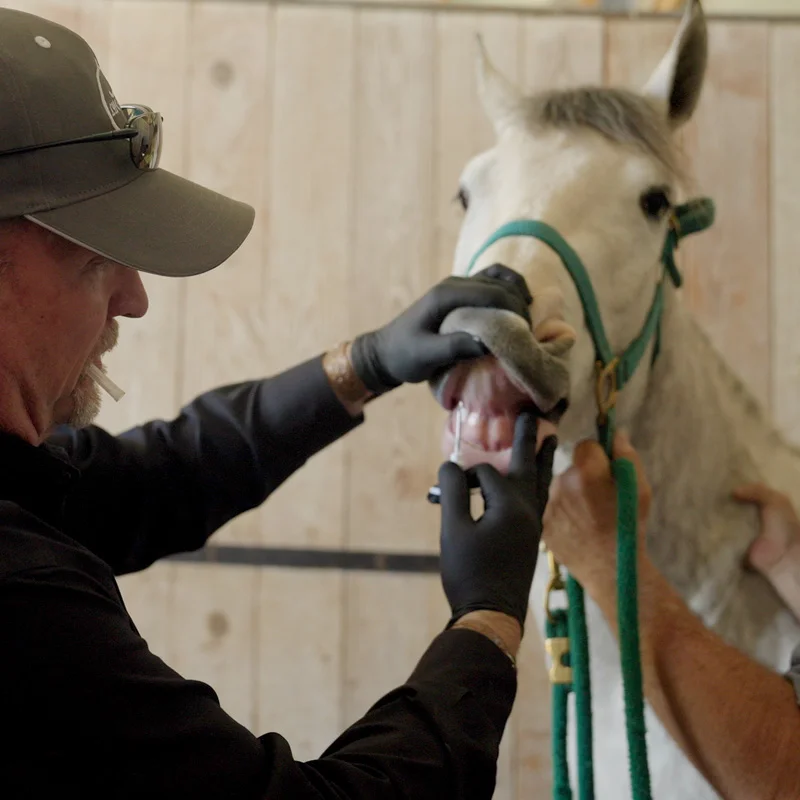
Lip Chip offers a new, more effective method of microchipping, and has partnered with veterinarians and technology experts to ensure our technology is both humane and practical. This method of implantation, which allows for less than 1% migration, is less painful for the horse when compared to chips in the nuchal ligament. By implanting the chip in the upper mandible, the scanner has unobstructed access to the site.
1. Implant
Lip Chip’s preferred placement of a thermal, ISO compliant, microchip is in the lip, not the traditional nuchal ligament. On average, microchips in the nuchal ligament (neck) migrate up to 30%, while microchips placed in the lip see less than 1% migration. Enjoy easy access when scanning your horse in the trailer, stall, or pasture as horses are naturally curious and approach foreign objects with their nose first. Lip Chip's patented lip placement is a ideal for those wanting to take their horse's health to the next level.
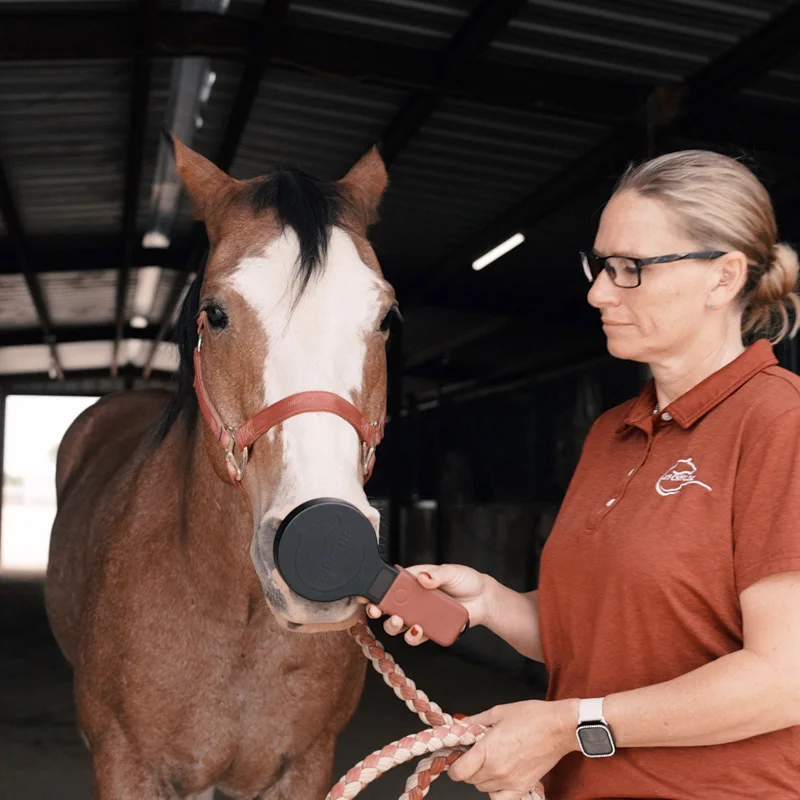
2. Scan
Using the state-of-the-art handheld reader, horse owners and handlers can quickly and easily scan the implanted microchip. The Bluetooth-enabled reader sends the unique identifier of the microchip to a smartphone, tablet, or PC, ensuring that the scanning process is efficient and user-friendly.
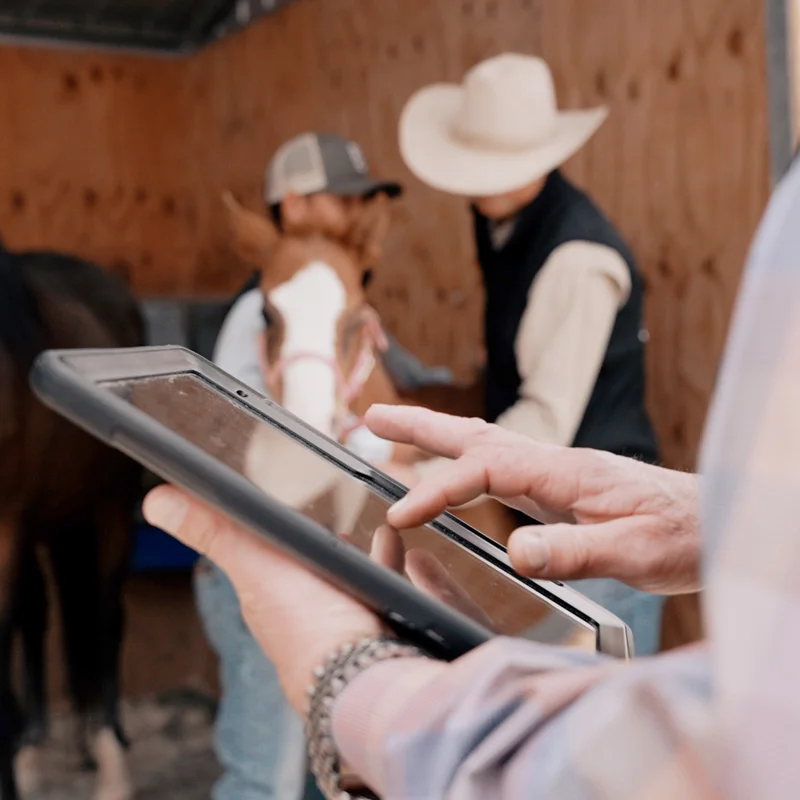
3. Unlock
Once scanned, the unique identifier from the microchip unlocks secure data linked to each horse. This information includes current Coggins, owner details, emergency contact numbers, and recent photos of the horse. This secure data transfer eliminates the need for hard copy paperwork and prevents issues such as forged documents or horse swapping.
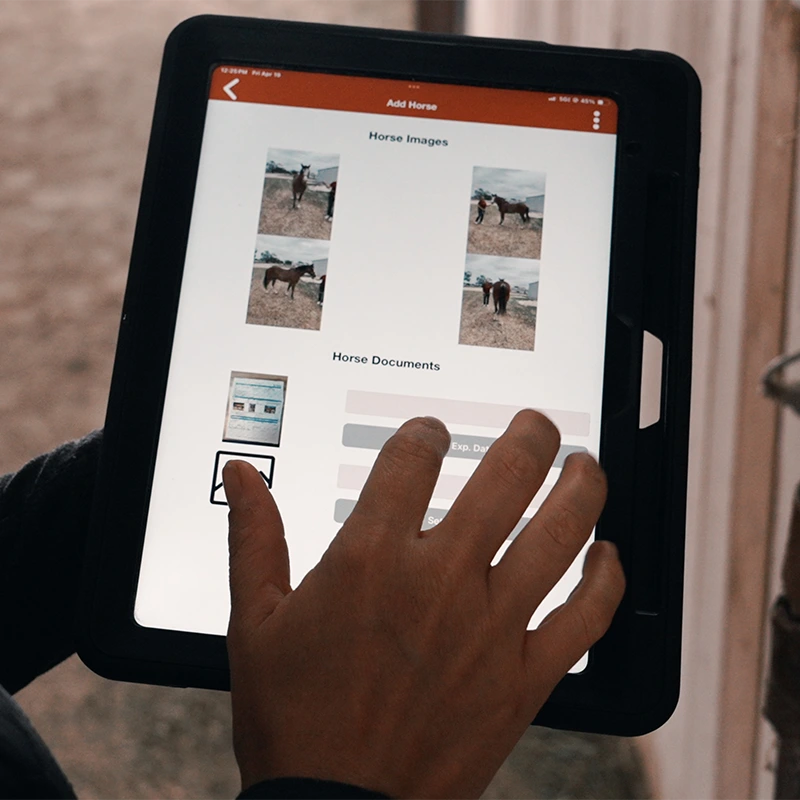
4. Manage Horses
The Lip Chip system allows for continuous monitoring of each horse’s health through the use of thermal microchips. These chips provide accurate baseline temperature readings and enable daily scans to catch potential health concerns early. The superior placement of the chip in the upper mandible position has been shown to yield more accurate temperature readings compared to traditional methods.
Issues with Traditional Microchips
Current equine microchips are placed in the nuchal ligament in the middle third of the neck. Due to the nature of the ligament, these microchips often migrate by up to 30% and can cause difficulty when scanning.
VS
Benefits of Thermal Microchips
Lip Chip's superior placement offers an additional benefit when using thermal microchips. Thermal microchips are used as a guide to check each horse's baseline temperature, and daily scans can often catch a health concern that would warrant a trip to the vet. Lip Chip testing has revealed a truer temperature in the upper mandible position versus the nuchal ligament by up to 2 degrees when compared to a traditional thermometer.
Advanced Bluetooth
Scanner
Quickly and easily scan your horse's microchip, displaying vital health data on your smart device for seamless monitoring and care.
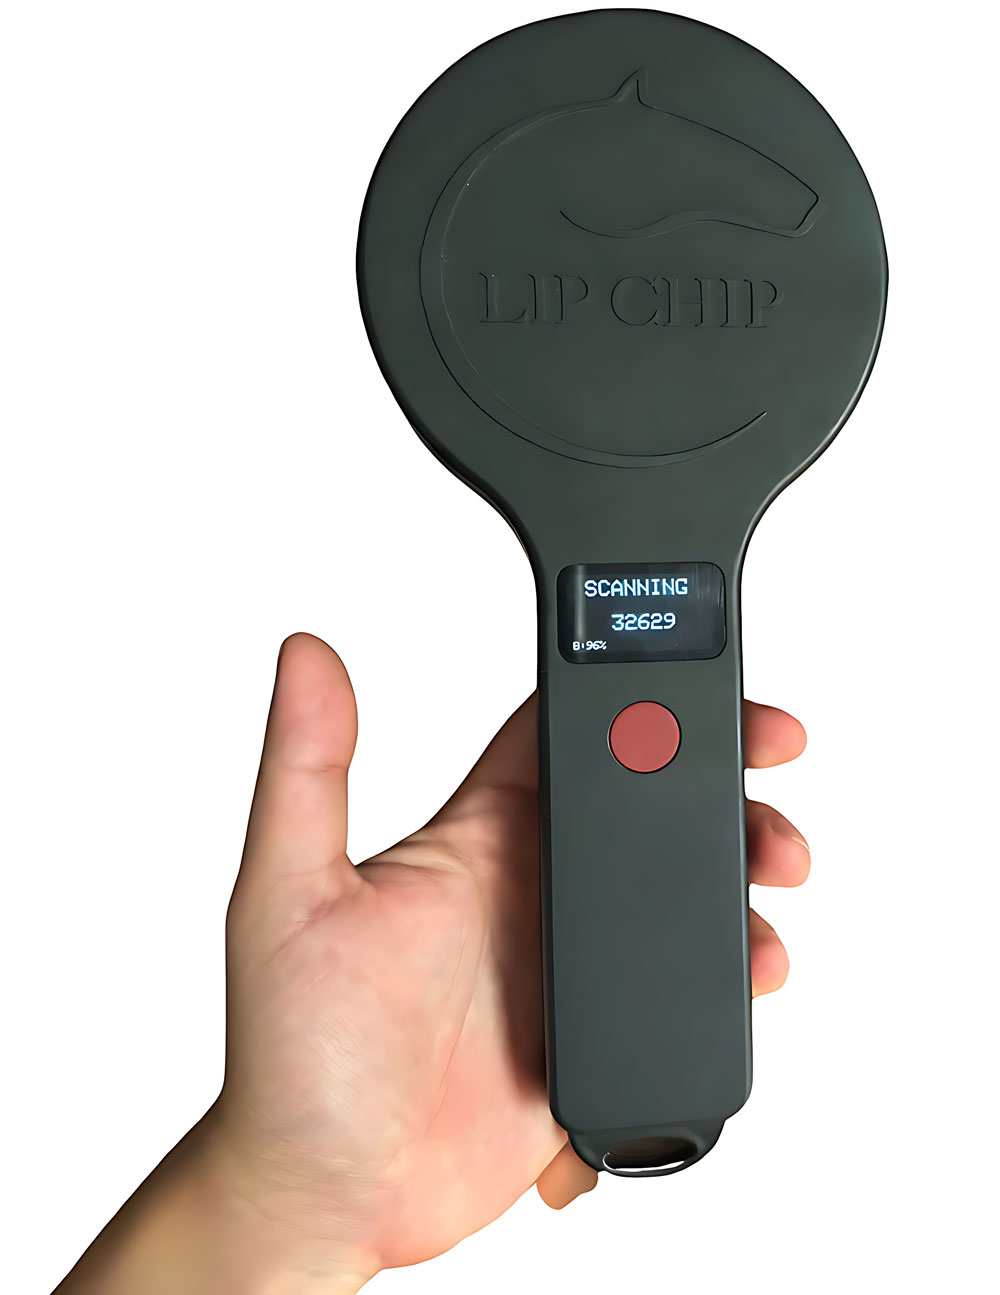
Designed and assembled by hand right here in the Texas.
Easy to read
Still have questions?
Visit our FAQs section to find answers and learn more about how our technology can benefit your horse.
Advanced Identification Solutions
Connect with Lip Chip
Discover how our innovative technology can revolutionize horse care and enhance equine well-being.
The HoofLink System
Lip Chip strives to make our technolgy a saddle partner for every horsemen. With benefits that range from easy daily temperature tracking, secure digitial storage of health and registration documents, easy identification of horse and ownership information, and it makes check in at equine events easy. The HoofLink System is the next step in upgrading your barn!
How can I sign up on the app?
You can register for our Hooflink system through our web app or our mobile apps (available on both iOS and Android). To sign up, we offer two registration methods: signing in with Google or with Apple.
Therefore, you will only need one of these accounts to register for Hooflink.
Remember that the features you can access will depend on your subscription plan.
Policies or Permissions
Why can’t I have access to specific use cases?
If you cannot see all or specific use cases; first check that your role has permissions for certain use cases, if you don’t have them and want to have them, contact the administrator. Important, this depends on your subscription plan.How can I know my user role?
You can see what user role you have, opening the side menu (top left corner) and clicking your user name, the following screen displays the user information where you can see your role.How can I know which groups my user is in?
You can see your group(s) opening the side menu (top left corner) and clicking your username. The following screen displays the user information where you can see your group(s) in the “Groups” section.
Internet connection / Sync
What should I do if I’m having trouble uploading my activities (Check ID, Templink, Check In, etc.)?
Make sure you have a strong internet connection. Our app works with both cellular and Wi-Fi networks, but if you have a lot of items to upload, we recommend using a Wi-Fi connection for a better experience.
If you are using the app mobile offline and the cloud status bar displays Pendings, don’t worry the app is waiting for an internet connection (cellular or Wi-Fi) to upload the images or objects.What should I do if the images are not uploading?
Make sure the “Sync Images” option is enabled.
We recommend using a Wi-Fi connection for a better experience.
Scanner
What should I do if I can’t connect my scanner?
Make sure you have the latest firmware version (you can check it at https://app.hooflink.com/versions).
Make sure your scanner is fully charged.
If you have the latest version of the scanner and still can’t connect, try the following step:
- If you were using one of our apps, close it and open it again.
- If you continue to have issues, please contact support.
What states/modes does my scanner have and how can I access them?
Single click changes the scanner between “STANDBY” and “SCANNING” states.

Double click puts the scanner in “CONNECTING” mode.
When a chip is scanned, the scanner changes its state to “FOUND ID”. Press the button once to return to “STANDBY”
To manually exit “CONNECTING” mode, press the scanner’s button twice.
The scanner automatically exits “CONNECTING” mode when it is successfully linked to your app, or when you abort the process.How do I know if my scanner is changing its status?
Every change of state is reflected on the app at the bottom of the screen. This is only shown on the use cases that require the use of the Scanner.

When the app stops detecting communication with the Scanner, the status will change to “NOT CONNECTED”. This will take up to 15 seconds to apply.
How can I select another connected scanner from my list of scanners?
To have quick access to all linked Scanners, there is a button next to the state’s label that lets you choose any Scanner. The app will only listen to this Scanner to avoid interruptions or unexpected behavior when multiple Scanners are being used nearby.
Make sure that other devices don’t use the same scanner at the same time or near each other or the tasks in the second device will be interrupted.

How should I scan a chip to use this functionality?
When you see this icon in the app, it means that you need to scan a chip in order to proceed.

When scanning a chip, be careful not to have metal obstacles very near the scanner, as they may affect the scanning action or the data transmission.
Functionalities
How can I enroll a horse?
If your user has permissions to do a Enroll a Horse, go to the Check ID window.
Identify the horse you want to add to the system; Approach the horse and set your scanner to scanning mode, then bring the scanner close to where the horse’s chip is located; The app will tell you if it found the horse or if it is already enrolled, if it is already in the system you don’t need to add it, but if it is not yet, the next step is to fill out the form and save the horse.
If you follow these steps; Congratulations, the horse is now in the HoofLink system.How can I do a Check-In?
Identify the horse you want to add a Check-In for.
If your user has permissions to do a check-in, go to the Check-In window.
Approach the horse and set your scanner to scanning mode, then bring the scanner close to where the horse’s chip is located; The app will tell you if it found the horse and whether it is not in the system or if it is already enrolled, if it is already in the system you don’t need to add it and the check-in will be saved; but if not yet, the next step is to fill out the form and save the horse.
Remember that when you do a check-in, you can add notes (optional).How can I do TempLink?
Identify the horse you want to add a TempLink for.
If your user has permission to do a TempLink, go to the TempLink window.
Approach the horse and set your scanner to scanning mode, then bring the scanner close to where the horse’s chip is located; The app will tell you if it found the horse and whether it is not in the system or if it is already enrolled, if it is already in the system you don’t need to add it and the TempLink will be saved; but if not yet, the next step is to fill out the form and save the horse.
Remember that you have a few seconds to check your horse’s temperature when doing TempLink.How can I do a Vitals Link?
Identify the horse you want to add a Vitals Link for.
If your user has permissions to do a Vitals Link, go to the Vitals Link window.
Approach the horse and set your scanner to scanning mode, then bring the scanner close to where the horse’s chip is located; The app will tell you if it found the horse and whether it is not in the system or if it is already enrolled, if it is already in the system you don’t need to add it and the Vitals Link will be saved; but if not yet, the next step is to fill out the form and save the horse.How can I do Official Works?
Identify the horse or horses you want to add to Official Works.
If your user has permissions to do official works, go to the Official Works window.
Approach the horse and set your scanner to scanning mode, then bring the scanner close to where the horse’s chip is located; The app will tell you if it found the horse and whether it is not in the system or if it is already enrolled, if it is already in the system you don’t need to add it and the Official Works will be saved; but if not yet, the next step is to fill out the form and save the horse.
Remember that you can add up to 4 horses per official work, and for a smoother experience,What is the purpose of the Dashboard section?
The dashboard section is a web view where you can see the dashboard; you can see in card format how many horses, TempLink, check-ins, etc., were carried out over any time period such as yesterday, a month ago, last week, etc.
It will be very useful for organizing your activities in the HoofLink system.
For a more comprehensive experience, visit app.hooflink.com on your computer for a better experience.How can I do a Test Barn Check-In?
Identify the horse you want to add to the Test Barn Check-In.
If your user has permissions to do Test Barn Check-In, go to the Test Barn Check-In window.
Approach the horse and set your scanner to scanning mode, then bring the scanner close to where the horse’s chip is located; The app will tell you if it found the horse and whether it is not in the system or if it is already enrolled, if it is already in the system you don’t need to add it and the Test Barn Check-In will be saved; but if not yet, the next step is to fill out the form and save the horse.How can I do a Test Barn Check-Out?
Identify the horse you want to add the Test Barn Check-Out for.
If your user has permissions to do Test Barn Check-Out, go to the Test Barn Check-Out window.
Approach the horse and set your scanner to scanning mode, then bring the scanner close to where the horse’s chip is located; The app will tell you if it found the horse and whether it is not in the system or if it is already enrolled, if it is already in the system you don’t need to add it and the Test Barn Check-Out will be saved; but if not yet, the next step is to fill out the form and save the horse.
Remember that you cannot do a Test Barn Check-Out without first having done a Test Barn Check-In for that horse.How do I assign a horse to a group from the app?
If your user has permissions to create a horse, go to the Check ID window.
The steps are the same as creating a horse, but when you are filling out the form, you should pay attention to the group section. There, you need to select which group or groups you want the horse to belong to.How to assign an activity (TempLink, check-in, etc.) to a group from the app?
Within each activity window, there is a group button. When you select the horse, you will not be able to choose a group because the horse you identified using ‘Found ID’ already has a group, and the activity will be saved in that group.


